Closet moisture & mould damage repair
This closet repair began with rot and mould caused by moisture entering through an exterior wall. The affected area was opened and damaged material cleaned out before a vapour barrier, insulation and drywall were installed. The twelve photographs below show the original condition, the interior rebuilding work and the painted closet with its shelves and hanging rail.
12 project photographs · Select any photo to enlarge it.
Moisture, rot and mould.
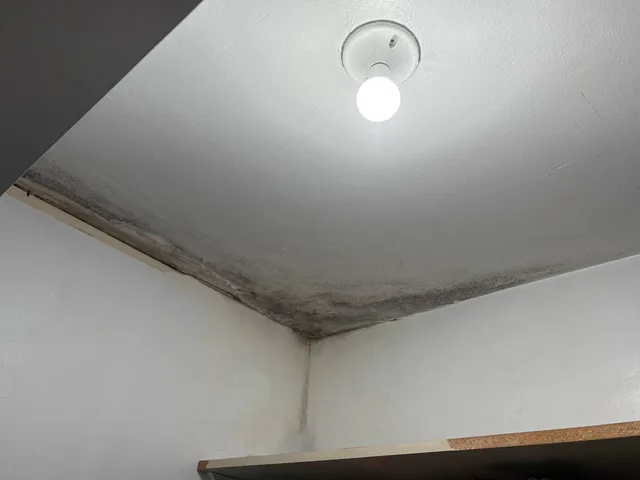
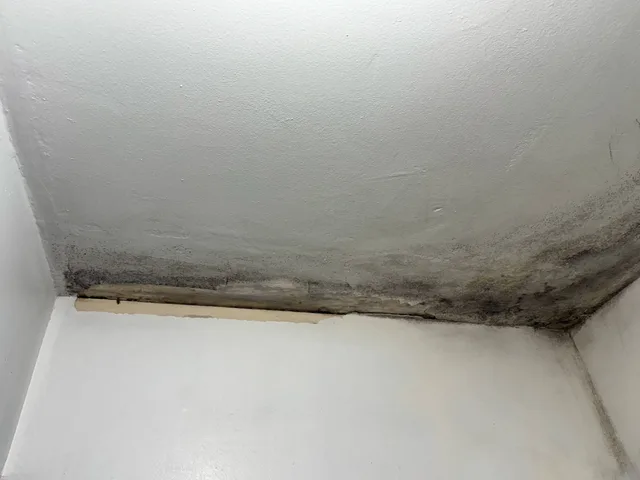
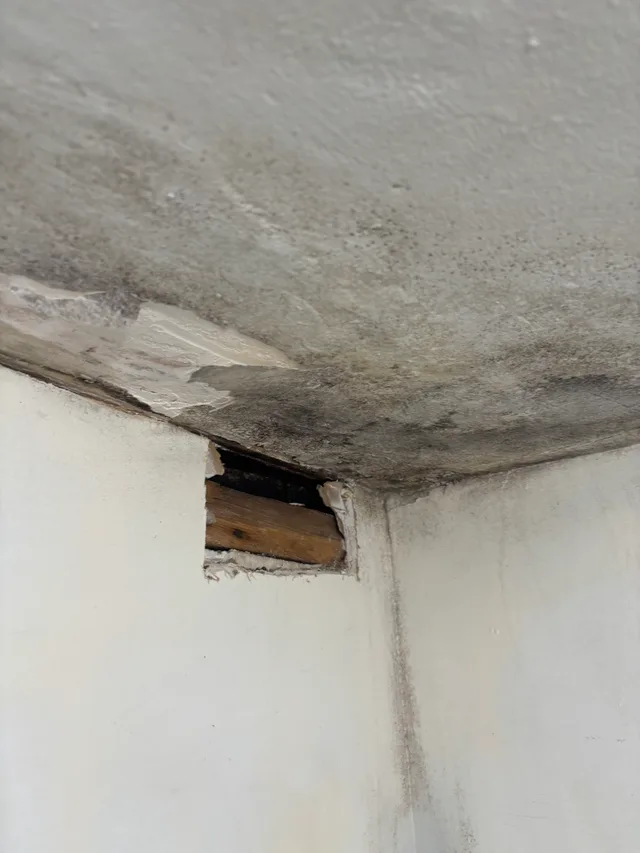
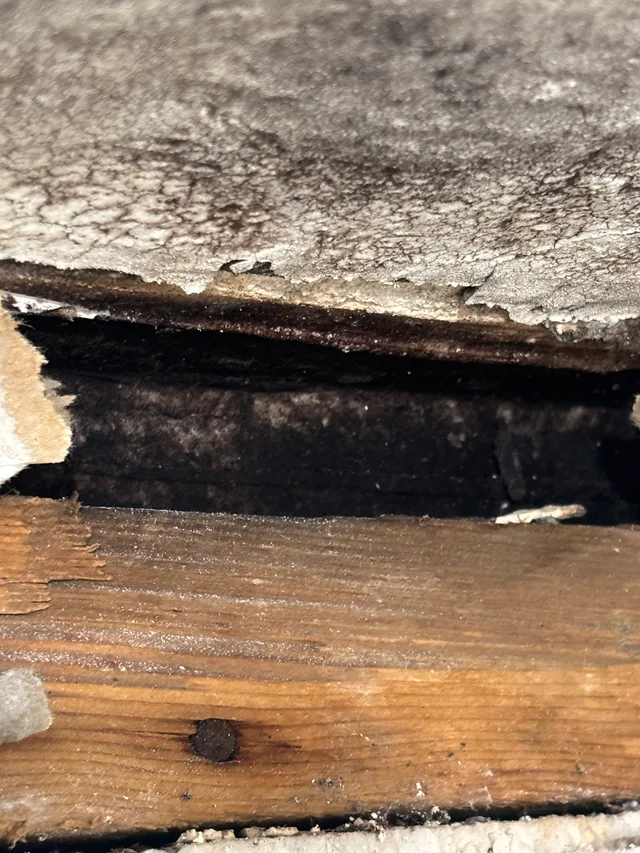
Moisture from the outside wall had affected the closet’s ceiling edges and upper walls, causing rot, mould, staining and peeling finishes. The damage extended behind the wall covering, so the work began by opening it up and cleaning out the affected material. The first four photographs show the condition at the ceiling perimeter, then the timber and cavity exposed through the opening.
 Problem
Ceiling & upper walls
Mould and staining trace the ceiling edges above the closet shelf.
 Problem
The damaged surface
The damaged ceiling corner and peeling finish before the wall was opened.
 Problem
Peeling ceiling finish
An upper-wall opening beneath a peeling, moisture-damaged ceiling.
 Problem
Inside the opening
A close view of the timber and cavity behind the wall covering.
Cleaning out and rebuilding.
The damaged material was cleaned out before the wall was rebuilt with a vapour barrier, rigid insulation and new drywall. Joint and corner preparation followed, readying the interior surfaces for painting.
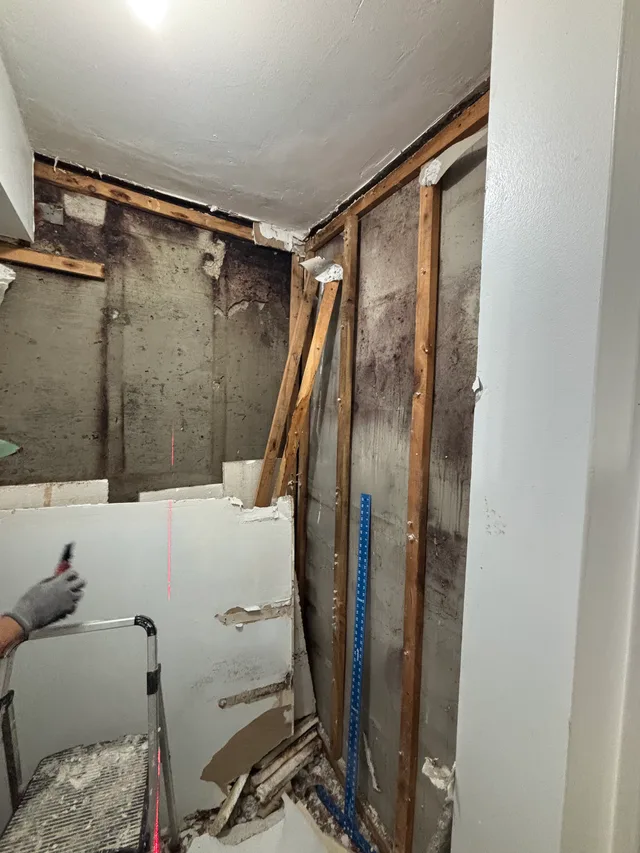
Open the walls and reach the damage
Removing the wall covering exposes the affected concrete, timber and ceiling junction.
 Process
Wall covering removed
Wallboard being removed to reach the affected surfaces.
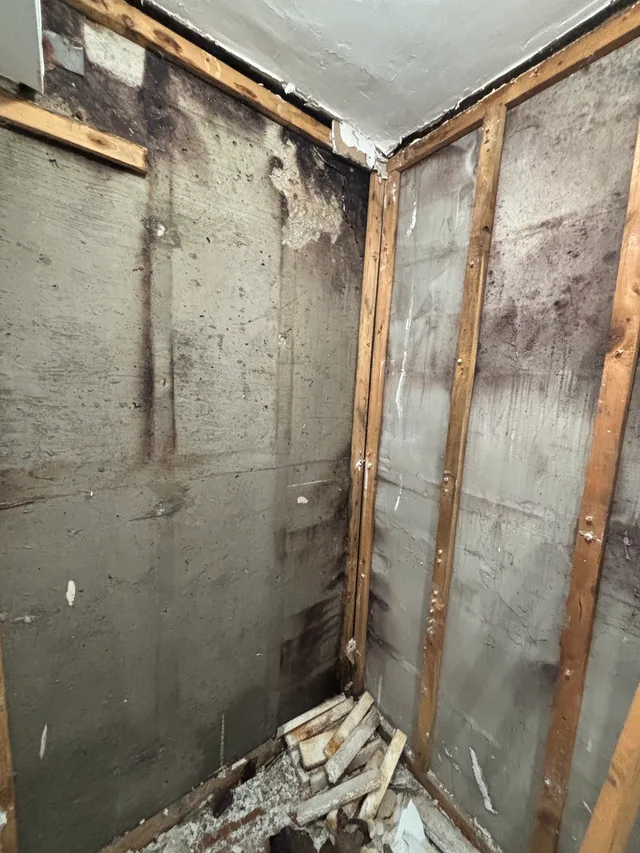 Process
The opened walls
Concrete and timber strips exposed, with removed material at floor level.
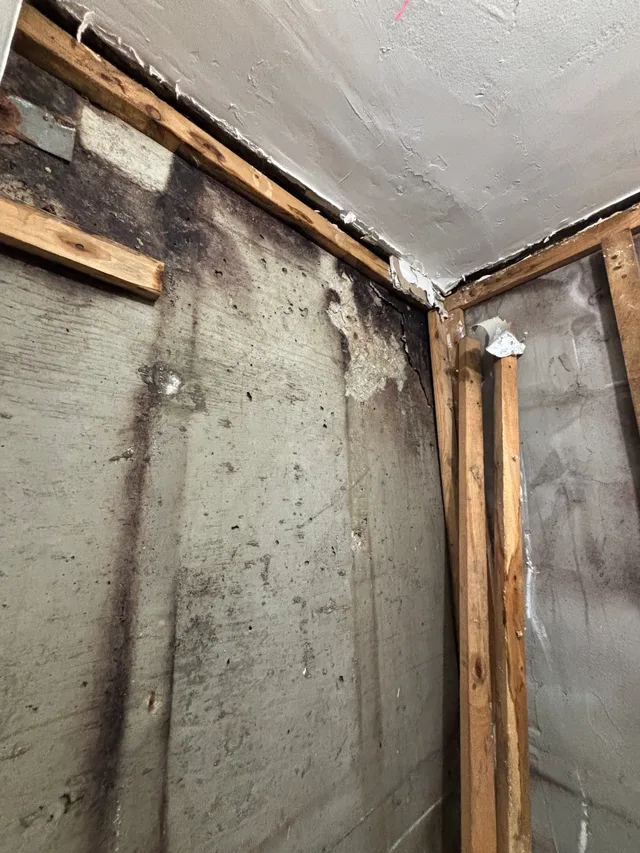 Process
The exposed wall corner
The opened corner shows the wall-to-ceiling junction before rebuilding.
Rebuild the wall layers
After the clean-out and vapour barrier work, rigid insulation is fitted before the wall is closed.
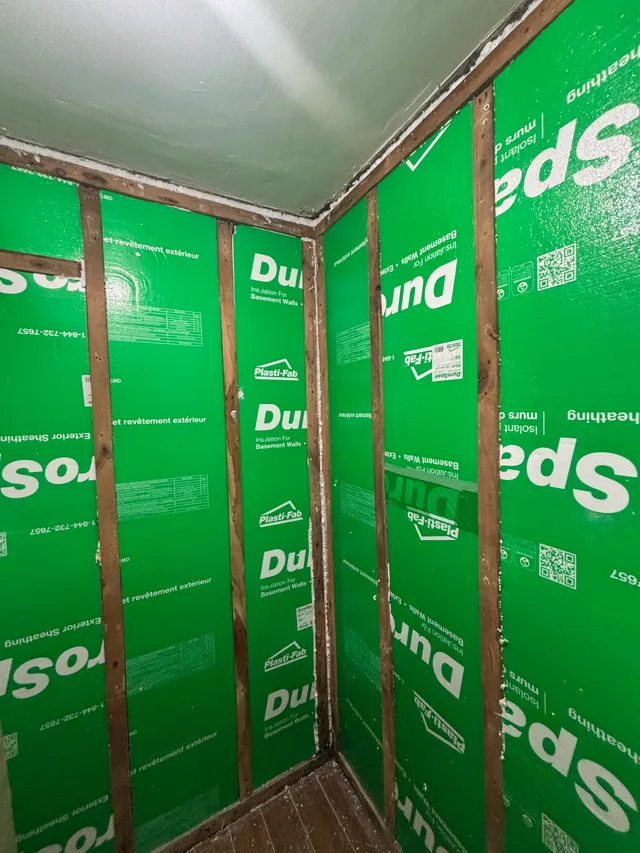 Process
Insulation fitted
Rigid insulation panels fitted between the timber strips.
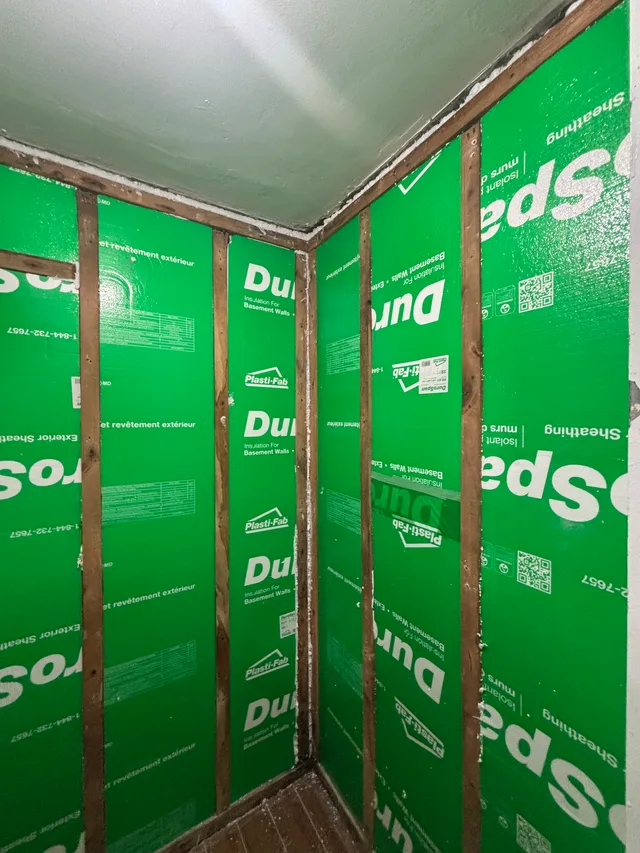 Process
Insulation at the corner
Insulation follows both walls into the closet corner.
Prepare the surface for paint
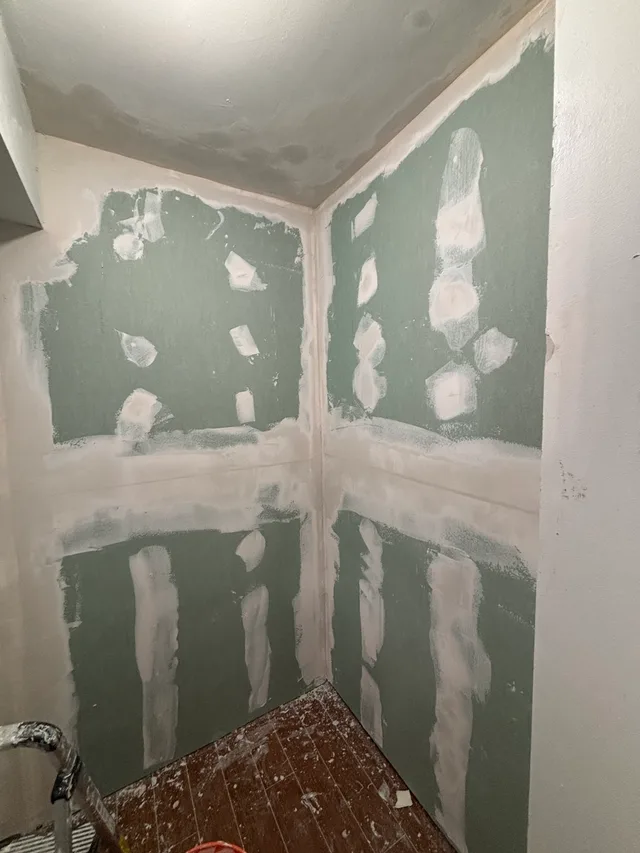
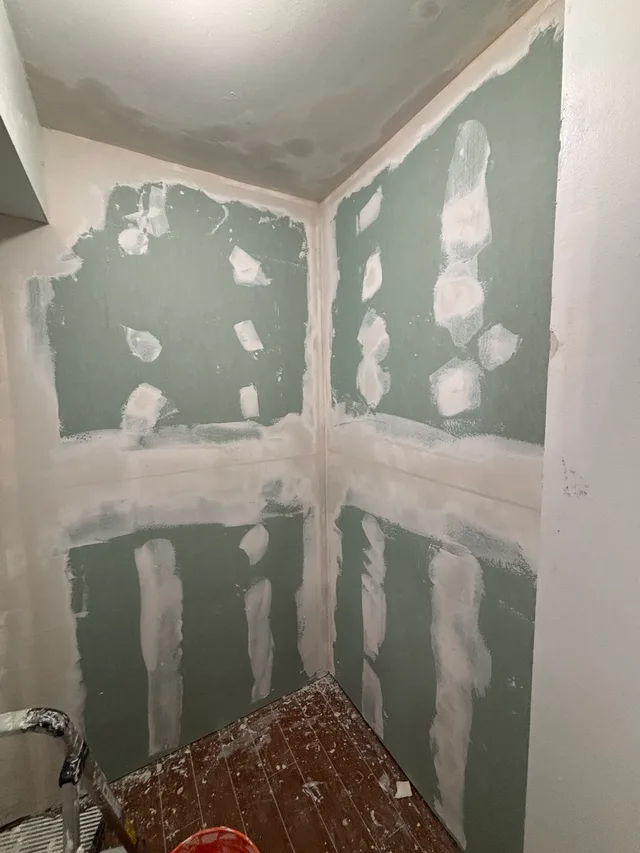
New drywall, joint compound and corner preparation form the base for the finished closet.
 Process
Drywall & joint preparation
New drywall in place, with joints and fixing points prepared with compound.
 Process
Drywall finishing detail
Compound covers board seams, corners and fastener positions before the painted finish.
The finished closet.
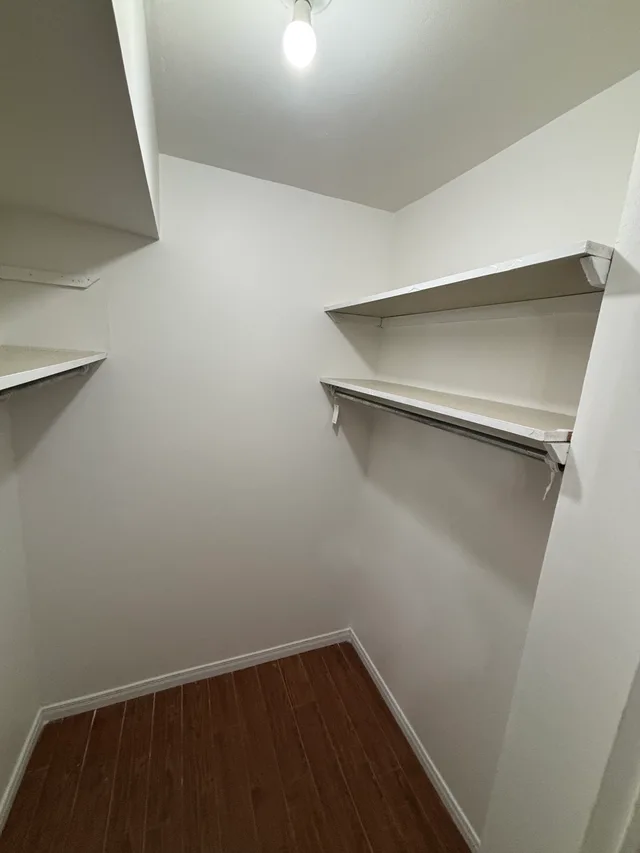
The finished photograph brings the sequence back to the whole closet. Painted walls and ceiling, shelving and a hanging rail complete the interior after the wall repair and finishing work. Together, the twelve views show the change from damaged ceiling edges and opened walls to the finished storage space.
 Completion
The completed closet
Painted walls and ceiling, shelving and a hanging rail complete the closet.
- Painted walls and ceiling
- Closet shelving
- A hanging rail
For a similar repair, describe both the damaged area and what you would like retained or reinstated. Include the shelves, rail and surrounding finishes in your enquiry so the discussion covers the whole space as well as the wall work.
Closet wall and ceiling repairs.
For closet wall repairs or drywall repair after moisture damage in North York, Toronto and the GTA, begin with the condition of the space and the finish you want. Raras Renovations can review photographs and discuss the scope of your enquiry. Include overall views of the room, close-ups of the damaged edges and any known history of water entering the area. Mention whether the work also involves the ceiling, painting, shelves or a hanging rail. If moisture is still appearing, include that detail when describing the problem. The next step is a conversation about the work and an assessment of the space.
Can only part of a room be repaired?
A repair may focus on one wall, a ceiling section or a larger area, depending on the condition found during assessment. Explain which surfaces are affected and whether you want the surrounding finish, shelving or other fittings included in the discussion.
What photographs should I send?
Send one view of the whole closet or room, followed by close-ups of the damage, ceiling edges and any openings. Add your location, approximate dimensions, any known moisture history and a short description of the finish you would like.
A repair to discuss?
Share photographs of the damaged area, your location and the work you have in mind.
